Black Widow Quick Start Guide

Congratulations and thank you for purchasing a new Black Widow key machine!
This Quick Start Guide is meant as a guide your to get key machine up and running as quickly as possible. If you would like more information, feel free to download the complete User Manual here.
Some things to note when using your machine, and reallyi most types of key machines in general:
- The cutters should be replaced on a regular basis. Delayed replacement or using a dull cutting bit can lead to loud noises and inaccurate key cutting.
- The cutting efficiency of the machine depends on the material type of the key blank. Try decreasing the speed and increase the number of passes when cutting key blanks made with harder materials.
- Be sure to mount the machine on a solid, secure surface.
- Clean the machine with a brush VERY FREQUENTLY. Never use compressed air to clean, and be careful not to let any liquids or excessive moisture into the machine.
- When removing your shield, please always keep it upright so the plastic will not scratch. Do not ever place the shield onto its face.
 |
Unpack Your Machine | Please DO NOT throw away your packaging. Key machines are notoriously difficult to ship safely without it, and that custom foam is very expensive to replace. | ||
 |
Install a Probe Into Both of the Collets You will need decoders in both the left and right sides to perform the calibration. Use the handy-dandy allen wrench with the yellow handle for this. |
 |
||
 |
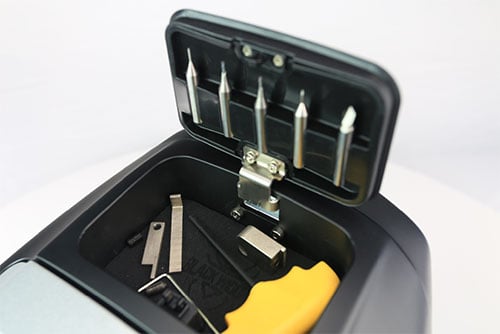
Place Your Accessories Into the Storage Compartment |
 |
||
 |
Download and Install the Black Widow App onto your Mobile Device(s) |
|
||
 |
Activate the Black Widow App Use the Serial Number ("SN") and Registration Code ("Code") found underneath the carrying handle to activate (log in to) your app. |
 |
||
 |
Calibrate your S1 Jaw We know you don't want to watch the video, you want to wing it and try and calibrate it on your own. Just watch the video, for heaven's sake. Please. Seriously. Watch it. |
|||
 |
Calibrate Your S2 Jaw (for Black Widow COMPLETE) |
|||
 |
Install the Cutter into the Right Collet Now that calibration is complete, you can put the cutter in now. The 2mm cutter is the most common you will probably use. |
 |
||
 |
Visit and Follow the We really are adding new, cool features to this machine pretty frequently. Please follow our Black Widow Facebook Page for announcements, and feel free to post there with any support questions. |
 |

